Vegan Gluten-Free Pumpkin Waffles

It’s that time of the year again. When the clock rolls back and drives parents everywhere crazy.

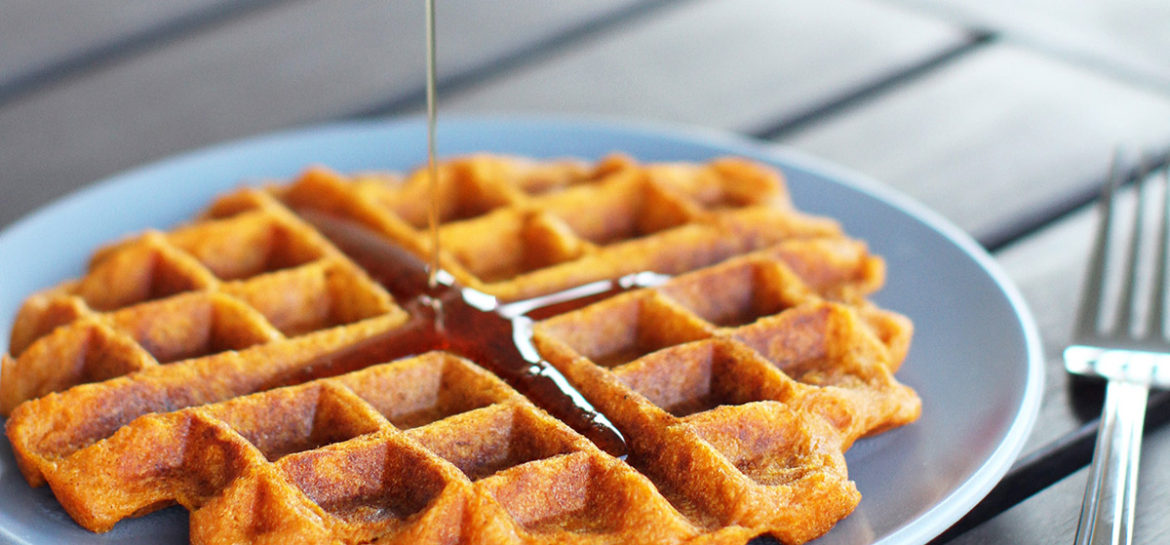
How about some vegan, gluten-free pumpkin waffles to take the edge off?

Vegan gluten free pumpkin waffles easy fall recipes

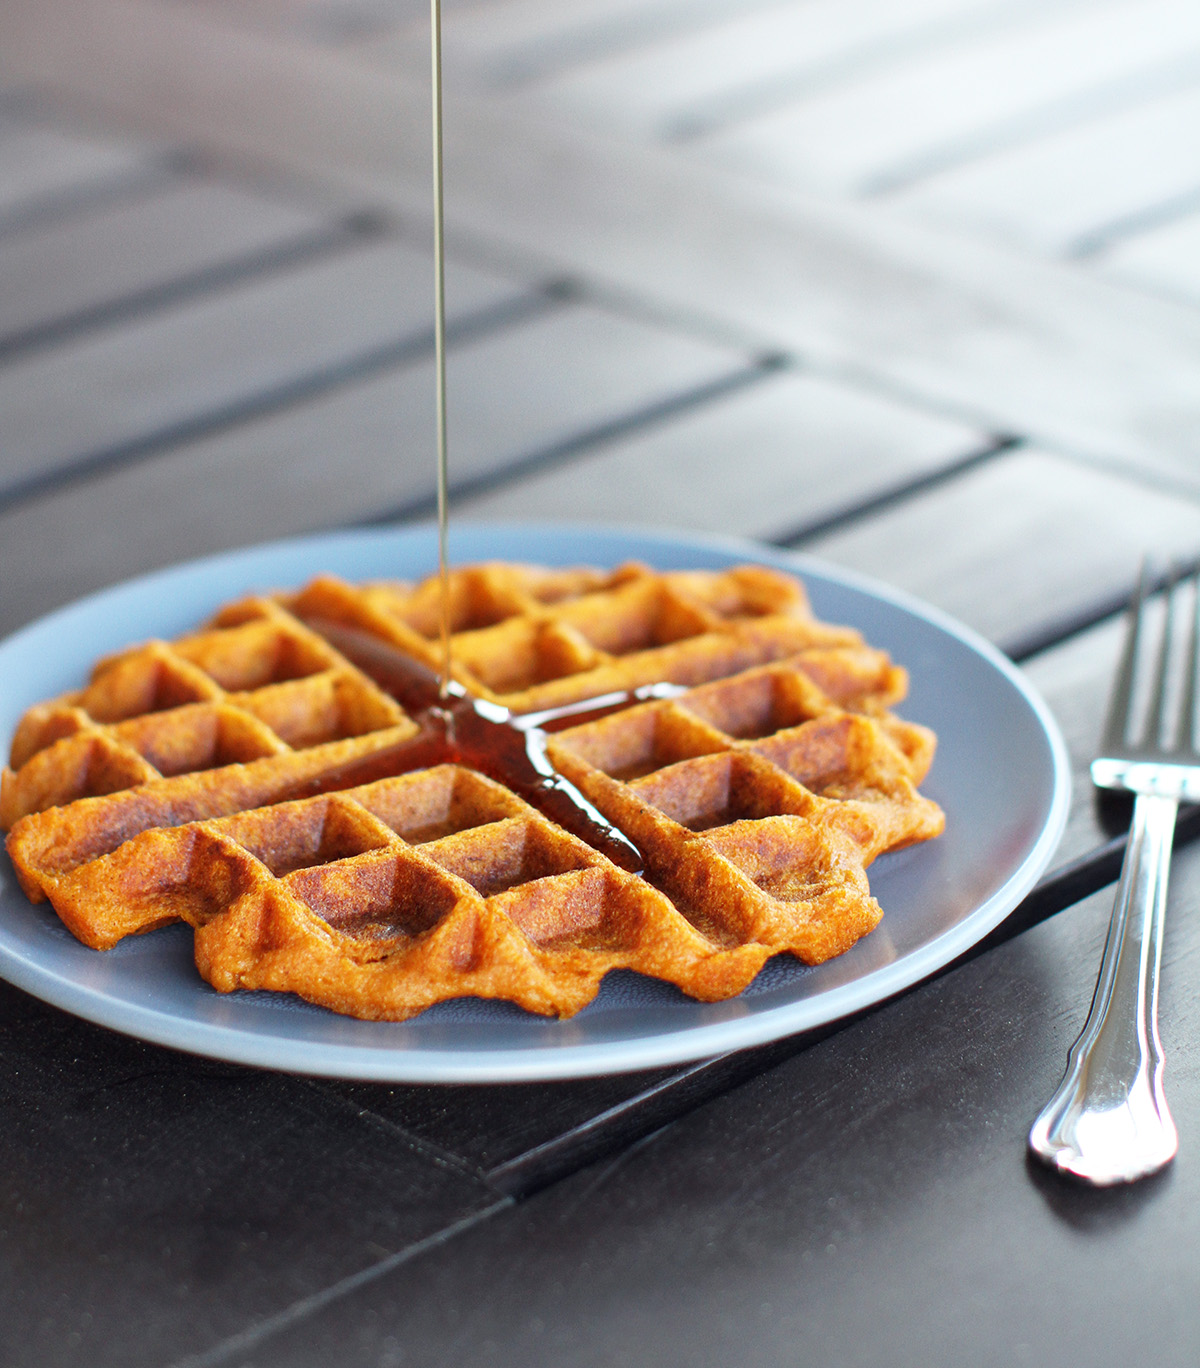
These come together in about 20 minutes and are great way to get some veggie goodness (are pumpkins a fruit or vegetable) in the family to kick off your morning.

Vegan Gluten-Free Pumpkin Waffles

Ingredients (makes 6 waffles)
1 1/4 cups non-dairy milk (I used almond milk)
1 tablespoon apple cider vinegar
1 cup canned organic pumpkin
2 tablespoons coconut oil, melted
1 1/2 cups gluten free flour (I used Bob’s Red Mill Gluten Free flour)
2 tablespoons brown sugar
2 teaspoons pumpkin pie spice
1 teaspoon baking powder (look for gluten-free type)
Pinch of sea salt
Pure maple syrup, for serving

Directions:

1. Preheat your waffle iron.
2. Combine the milk and apple cider vinegar in a large mixing bowl and set aside for a few minutes.
3. In another mixing bowl, combine the dry ingredients: flour, brown sugar, pumpkin pie spice, baking powder, and sea salt.
4. Add the pumpkin and coconut oil to the mixing bowl with the milk. Whisk until well blended.
5. Slowly add the flour mixture to the pumpkin mixture and mix just until combined.
6. Scoop about 2/3 cup of pumpkin waffle batter onto your heated waffle iron (or as much as your waffle iron instructions say to use). Then cook until the outside of the waffle is crispy (or as your waffle iron instructions say to do).
7. Serve immediately with the maple syrup and enjoy!

Choosing a Martial Arts School for your Child

It’s no secret that martial arts classes for kids are insanely popular. Especially out in the ‘burbs where we live, there seems to be at least one martial arts school in every other shopping center.

Who wouldn’t want to raise a little ninja, right?

Choosing a martial arts school for your kids

Plus, the benefits of a martial arts program are endless. Kids will learn important life lessons that they will carry with them into adulthood. From building confidence to learning respect for yourself and others to developing self-reliance – there’s no team in martial arts, you need to depend on yourself.

The reason Marvel got started in her martial arts classes was due to my encouragement. I had something to do with it (a lot to do with it).

I love kickboxing and boxing, so naturally, I have a circle of friends who are really into it too. Once my girls saw us being bad asses on the heavy bag, they wanted to try it out too.

We went through a couple schools before we found “the one.” Here’s what I learned through my experience:

Choosing the right martial arts school for your child is difficult. What do you look for?

  1. Do your research on the type of martial arts and narrow down to which discipline(s) to take a closer look at. The most popular ones with children’s programs tend to be karate, taekwondo, and jiu jitsu.
  2. Test out at least 2-3 schools before committing to one.
  3. Observe how the instructors interact with the students. Are they firm, yet engaging?
  4. What is the instructor to student ratio? Some schools have 10 students per instructor… I prefer at most 4-5 students per instructor.
  5. Ask: how quickly do students move up in belts? Are yo ujust paying for a new belt color or is the student actually learning the skills?

Reese’s Cup Chocolate Fat Bombs

Reeses Cup Chocolate Fat Bombs easy keto recipes thumbnail

Today’s National Chocolate Day, and what better way to celebrate than with chocolate!

These will take care of those chocolate cravings and won’t cause your blood sugar to spike, which is awesome to give as a treat to the kids, or just keep for yourself.

It’s basically a Reese’s Cup that is actually good for you. Have you looked at the ingredients list of an actual Reese’s Cup? It’s scary – and I’m not just saying that because it’s almost Halloween.

Reeses-Cup-Chocolate-Fat-Bombs-easy-keto-recipes-for-kids

Reese’s Cup Chocolate Fat Bombs

Ingredients (makes 12 pieces in regular muffin pan, 24 pieces in mini muffin pan)
1 cup dark choc (chopped, melted)
1/4 cup coconut oil
1 tsp vanilla
1/2 cup nut butter, almond or cashew
1/4 cup honey
2 tbsp coconut oil, melted

Directions:

1. Bring a small pot of water (about 1 inch of water) to a simmer. Put dark chocolate chips, vanilla extract, and coconut oil in a heat safe glass or metal bowl and place bowl on the small pot. Stir chocolate mixture until mostly melted.
2. Remove bowl from the heat and stir the chocolate mixture until fully melted and smooth.
3. In a muffin pan (or mini muffin pan), place liners in each section and scoop about 1 teaspoon of chocolate into each liner. Place muffin pan in fridge for about 20 min or until the chocolate has hardened.
4. Mix the nut butter, honey, and 2 tbsp melted coconut oil in a bowl until smooth.
5. Drop a scant teaspoonful of nut butter mixture into each cup, place muffin pan back into the fridge for about 20 min or until hardened.
6. Top with another teaspoonful of chocolate mixture, place into fridge to harden.
7. Remove from paper liners and enjoy!

Why We Eat Gluten Free

Why we are Gluten Free

Why we are Gluten Free

I’m going to start off with a disclaimer: I’m not a doctor or nutritionist so everything I’m saying here is from my own personal experiences. 

My family is gluten-free, we started down this journey after my amazing friend & holistic health coach started working with my youngest daughter on her eczema. My daughter has had a dry skin issue ever since she was born and I just couldn’t stand seeing her in so much discomfort all the time.

So, we went on a gluten-free, dairy-free diet to clean up her gut, remove any internal inflammatory issues, and clear her skin. The rest of the family also went gluten and dairy-free, because it was easier (and more fair) to do it that way. Can you imagine having a toddler eat “special” food while her older sister chows down on traditional mac n’ cheese?

After a couple weeks of this new lifestyle, my daughter’s face cleared up and as a side effect, I lost weight. Wait, what? Without putting myself on a diet, I ended up getting healthier and feeling better too.

Gluten can have adverse effects, even in people who don’t have celiac disease. From gut inflammation, bloating, brain fog, and autoimmune diseases gluten could be affecting your body and you’re not even aware of it.

Tips for eating gluten-free:
– Avoid processed foods as much as possible and pick carbs that are naturally gluten free: rice and potatoes
– Read your labels, gluten and wheat is in 90% of all packaged foods in the US
– Eat more produce: all fruits and veggies are naturally gluten free
– Find substitutions: we used to cook with soy sauce, a lot. We made the easy switch to tamari.

Avocado Toast with Roasted Chickpeas

“Avocado toast! Avocado toast!! AVOCADO TOOOOOOOOAST!!!”

That’s my girls every time they see me pull out an avocado. And we eat a lot of avocados in our house… from breakfast to smoothies… and on and on. So yeah, I hear the plea for avocado toast – a lot.

avocado toast roasted chickpeas easy vegan recipes for kids

Luckily, it’s super easy to make, and I don’t mind the girls eating tons of it because avocado is so good for them.

This is one of my go-to quick and easy dinners when I’m exhausted after a long day of work and can’t bring myself to make a “fancy” dinner. This pulls together so quickly and easily, and we tend to just eat as slices of bread get toasted.

avocado toast roasted chickpeas easy vegan recipe

Avocado Toast with Roasted Chickpeas – 30 min prep & cook time

Ingredients (makes about 12 slices of toast)
1 can organic chickpeas
1/2 Tbsp avocado oil
sea salt to taste
1/2 tsp garlic powder
1/2 tsp smoked paprika
gluten-free sliced bread
2 ripe avocados

Directions:
1. Heat the oven to 400˚F.
2. Drain and rinse the chickpeas, then pat dry with a paper towel.
3. Pour the chickpeas into a medium bowl, drizzle with avocado oil, and sprinkle with a pinch of sea salt. Toss with a spoon to combine.
4. Line a baking sheet with parchment paper (optional, but makes clean up much faster), and pour the chickpeas onto the sheet. Make sure the chickpeas are spread out so that they are in a single layer.
5. Bake the chickpeas for 20 minutes, tossing halfway.
6. When the chickpeas are done, remove from the oven and pour into a medium bowl. Sprinkle the garlic powder and paprika on top and toss to combine. Set aside.
7. Toast the slices of bread in a toaster to desired level of toastiness.
8. Cut the avocados in half, remove the pit, scoop the avocado out into a bowl, and mash it up with a fork. Optional, add a pinch of sea salt to the mashed avocado and mix in well.
9. Spread the mashed avocado onto a slice of toast, then scoop a spoonful of chickpeas on top.
10. Serve immediately and enjoy!

Korean Stir-fried Rice Cakes

Korean rice cakes are a favorite in our house. We tend to cook a lot of Asian inspired dishes, it’s what I grew up eating and it’s my comfort food. Plus, it’s super easy to make dishes naturally gluten and dairy free.

Korean veggie stir fried cakes easy vegan recipe for kids

This is my quick and light take on the Korean street food: “tteok” or rice cakes. It’s vegan & gluten free and comes together very quickly. The crispy vegetables, bok choy, carrots and bean sprouts provide a refreshing contrast to the chewy rice cakes.

Korean veggie stir fried cakes easy vegan recipe

Korean Stir-fried Rice Cakes – 30 min prep & cook time

Ingredients (4 servings)
1 1/2 cups Korean Rice Cakes
3 tbsp avocado oil, divided
1 16oz packaged organic tofu, firm (cut into 1/2 inch cubes)
1 clove garlic, minced
1, 1 inch piece of ginger
1/2 yellow onion, diced
3 bunches baby boy choy
1 carrot, julienned
1 cup bean sprouts
1 tbsp tamari
sea salt, to taste
black or white pepper, to taste
1 tsp toasted sesame oil

Directions:
1. Heat a pot of water to boil. Once the water is boiling, add the rice cakes and boil for 2-3 minutes until the rice cakes are soft. Drain water and set aside.
2. Heat 1 tbsp avocado oil in a frying pan over medium heat. Add the tofu to the frying pan. Let fry for 2-3 minutes, then stir up the tofu so that sides that weren’t fried are face down in the oil. Let fry another 2-3 minutes until some sides of the tofu are fried golden brown. Remove tofu from heat and set aside.
3. In a wok, heat 2 tbsp avocado oil over medium heat. Add the garlic, ginger and onion. Saute for 1-2 minutes until the onion turns translucent.
4. Add the carrots  to the wok, season with a pinch of sea salt, and saute the mixture for 2 minutes until the carrots soften.
5. Add the bok choy to the wok, season with a pinch of sea salt, and saute the mixture for 1-2 minutes until the bok choy starts to soften.
6. Add the bean sprouts to the wok and saute for 30 seconds.
7. Add the rice cakes to the wok and mix
8. Add the tamari to the rice cakes and veggies and mix to combine well.
9. Add about 1 tsp pepper and mix to combine well.
10. Drizzle the sesame oil over the veggies & rice cakes and toss.
11. Remove from heat, plate and enjoy!


Veggie Turmeric Fried Rice

Veggie fried rice: this is my ultimate way to get veggie, protein, essentially… all the healthy stuff into my kids without having to turn to begging, pleading or bargaining with them.

Veggie-Turmeric-Fried-Rice-easy-recipe-Little-Hero-Project

Fried rice is known as the Chinese version of the casserole. It is the absolute best way to use up extra veggies and you can put almost anything in fried rice and it’ll come out delicious. And as an added bonus, it’s a great way to make sure the kids get their veggies in.

Veggie-Turmeric-Fried-Rice-easy-recipe-for-kids-Little-Hero-Project

More traditional versions of fried rice don’t include the turmeric, but I like to toss it in for a a touch of extra flavor and a ton of added health benefits.

Veggie Turmeric Fried Rice – 30 min prep & cook time

Ingredients (4-6 servings)
1 1/2 cups Jasmine Rice (cooked)
3 tbsp avocado oil, divided
3 Eggs
3 cloves garlic, minced
3 organic carrots, peeled and cubed
1 organic medium zucchini, cubed
1 yellow onion, diced
turmeric (organic, optional)
2-3 tbsp coconut amnios, to taste
sea salt
white pepper, optional
1 tsp, sesame oil

Directions:
1. Heat 1 tbsp avocado oil in a frying pan over medium heat.
2. Crack eggs into heated avocado oil and lightly scramble. Remove from heat when eggs have just stiffened.
3. Heat 1 tbsp avocado oil in a wok (a large skillet will work as well) over medium high heat.
4. Add the garlic to the heated oil and sauté for about 30 seconds until fragrant.
5. Add the carrots to the wok, toss with the garlic and sprinkle with some sea salt. Sauté for 3-4 minutes until the carrots start to soften.
6. Add the zucchini to the wok, toss with the garlic and carrots and sprinkle with sea salt. Sauté for 2-3 minutes, until the zucchini starts to soften.
7. Remove the carrot & zucchini mixture from the wok, into a medium bowl and set aside.
8. Heat the remaining 1 tbsp avocado oil in the wok over medium high heat.
9. Add the onion and sauté for 2-3 minutes until the onion starts to turn transparent.
10. Add the cooked rice to the wok with the onions and sauté for 3-4 minutes, making to sure dry all parts of the rice in the oil.
11. Add the cooked egg to the rice and mix to combine well.
12. Add the turmeric to the rice, mix to combine well. Then add the cooked carrots & zucchini, mix to combine well.
13. Add the coconut amnios to the rice mixture and mix to combine well.
14. Add white pepper to taste (optional)
15. Finally, drizzle the sesame oil over the fried rice and mix to combine the flavors.
16. Remove the fried rice from heat, plate for serving, and enjoy!


Breakfast Power Salad

Who says you shouldn’t have salad for breakfast? This is a quick and easy one to get your protein, greens and fats in before you go conquer the day.

An added bonus, you’ll stay feeling full all the way until lunchtime.

Breakfast-Eggs-Avocado-Salad-Easy-recipe-Busy-Moms-Little-Hero-Project
Ingredients (1 serving)

2 eggs, organic & pasture raised
1/2 tbsp avocado oil
pink salt (can sub sea salt)
freshly ground black pepper
50/50 salad greens (blend of baby spinach and spring mix)
1/2 avocado
1 tsp extra virgin olive oil
juice from 1/2 lemon

Directions
1. Heat the avocado oil up in a frying pan over medium high heat.
2. Once oil is hot, crack both eggs into the pan, sprinkle with salt and pepper and let cook for about 2 min until the bottom is golden brown. Then turn off the heat and flip the eggs over to let the other side cook just slightly (or more if you prefer a egg over hard), then remove from the frying pan.
3. While the eggs are frying, plate the salad by adding as much of the salad greens as you want onto a plate (I generally go with two handfuls)
4. Slice the avocado into small chunks and scoop onto the salad.
5. Drizzle about 1 tsp extra virgin olive oil and the lemon juice over the salad and avocado. Sprinkle with a pinch of pink salt.
6. Top the salad with the two fried eggs, and enjoy!

Green Mighty Morning Smoothie

This is how I get tons of healthy goodness in my whole family. After breakfast, I blend up one of these babies and we drink together to celebrate the start of another amazing day. The kids drink their veggies down and sometimes we pretend that it’s “ice cream” and eat with a spoon.

Morning-Green-Smoothie-recipe-for-kids-Little-Hero-Project
Psst… when we’re in a hurry, and I don’t have time to make breakfast for myself, I blend up one of these babies and take it in the car with me on my commute to work. I haven’t spilled on myself yet!

Morning-Green-Smoothie-easy-recipe-for-kids-Little-Hero-Project
Ingredients (2 servings)

1/2 avocado
1 banana, peeled
1 cup frozen mangos
1 tbsp ground flax seeds
1 tbsp ground chia seeds
1 scoop Mighty Maca powder (optional, but recommended)
2 cups organic baby spinach
3/4 cup organic coconut milk beverage

Directions:
1. Put all ingredients in a blender and blend until smooth
2. Pour into glasses and enjoy!